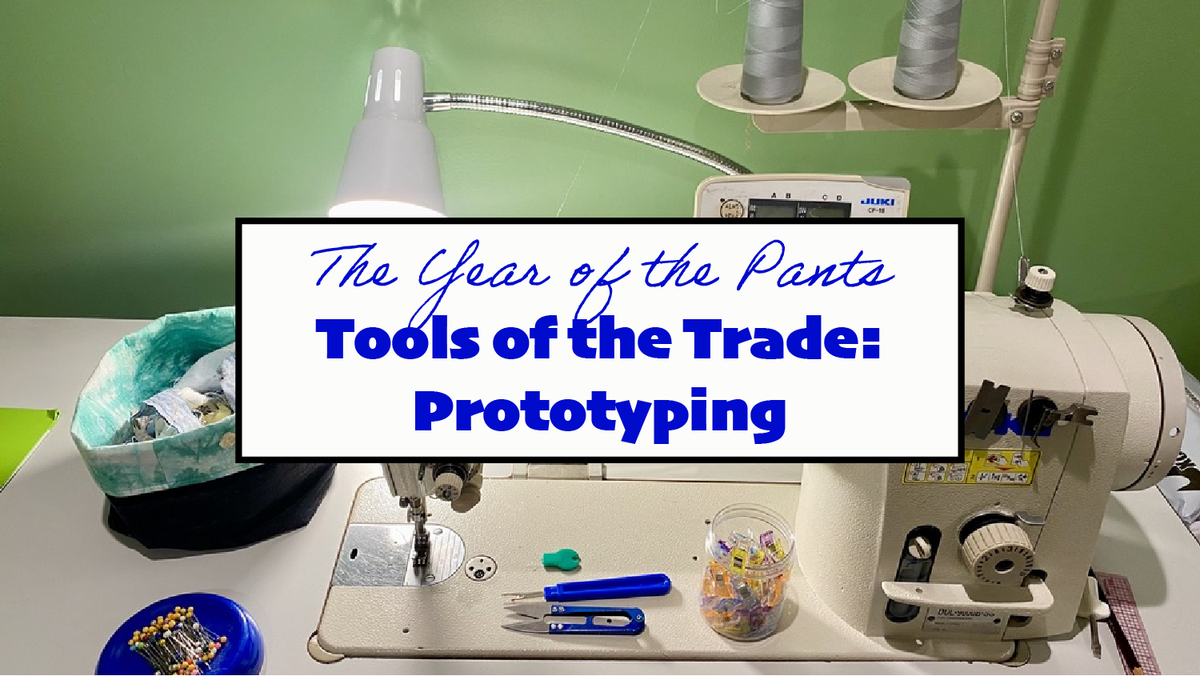
Tools of the Trade: Prototyping

This post is part of a series called 2020: The Year of the Pants. Catch all of the posts via the YOTP tag.
Now that we’ve got our first draft of the block, we need to try it on! While it might be tempting to get some awesome fabric and sew it together right out of the box, I highly advise against it. The chances of it being close but not quite right are so high, that the I often consider the very first fabric-version to be a practice option at best.
But first, let’s go over the tools we need to bring the 2-dimensional paper pattern into 3-dimensional reality!
Essential Tools for Prototyping:
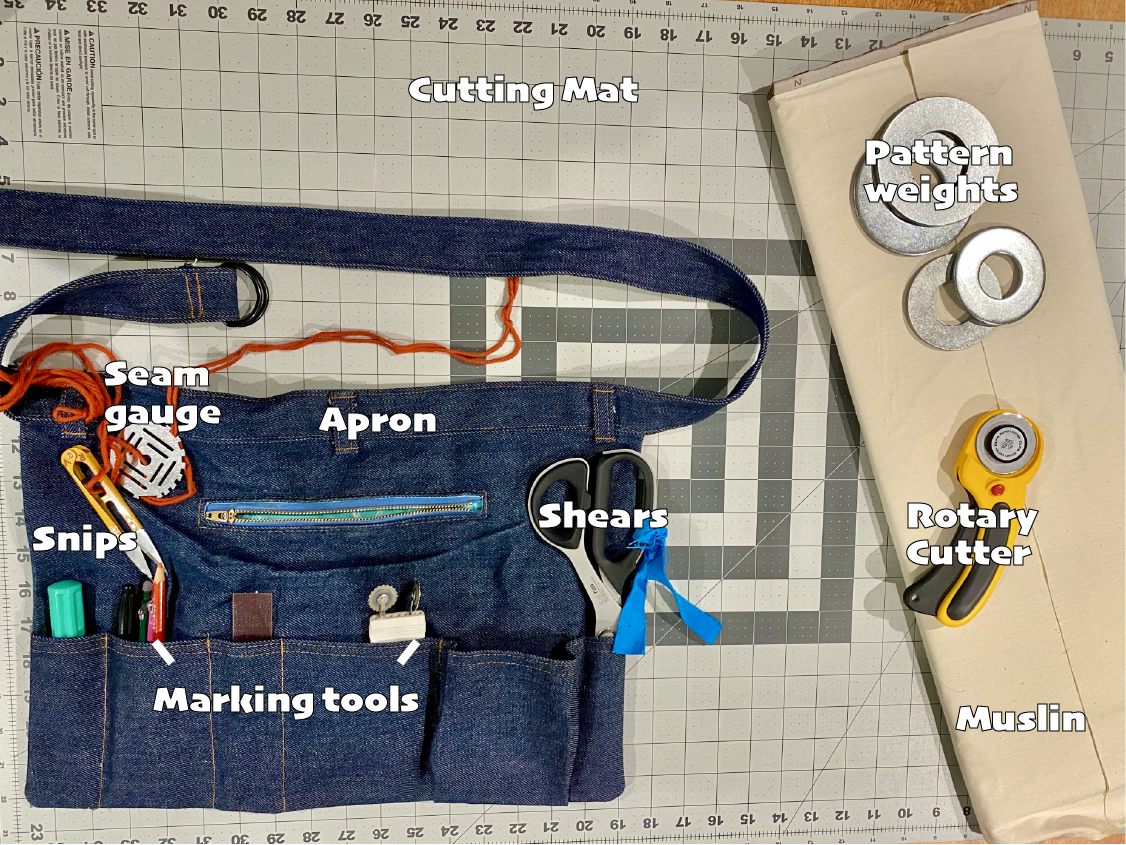
- Muslin: This fabric is traditionally a super cheap cotton woven (around US$4/yard) that you don’t mind marking up and eventually throwing away. If you’re planning to work with a very specific type of fabric (eg a loose knit or stretch woven), it would be wise to find something with similar drape, stretch, and other properties but kinda cheap that you also don’t mind marking up and eventually throwing away.
- A really, really great pair of shears: I like something in the 10" range, though longer can be good, too. Make sure they're angled (there's an art to cutting with scissors, and it involves keeping the bottom part touching the table; I'm sure there's a YouTube video describing it). I can't emphasize enough the importance of getting a solid pair of brand of shears that will last a really long time, like Kai. They’re a little more expensive, but they’ll last you literally forever. When they get dull, take them to a professional sharpener. Also: get the right size handle for your hands (the scissors should be comfortable to hold). Nothing's worse than tired hands when you're only halfway through cutting out the pattern!
- A rotary cutter and cutting mat: I personally prefer to use a rotary cutter, but everyone is different. Rotary cutters come in a variety of sizes, but I find a 45mm one to be pretty good for most applications. I especially like the kind of rotary cutter that automatically disengages the blade when I'm not cutting: there are far fewer random cuts on my fingers as a result 😬 I also like having a big cutting mat - shifting fabric around tends to result in improperly cut pattern pieces, which will affect the fit, no matter how good the pattern might be.
- Pattern weights: These are for holding down your pattern on your fabric. Some folks use pins, but I don't like worrying about little holes in my fabric. Protip: I bought some really big washers from the hardware store, because I don't need anything fancy.
- Marking tools: It’s important to transfer markings from the pattern (eg darts and notches) to your fabric so that you don’t need to have the pattern with you at all times during the sewing process. You can use pens (I use Frixion pens because - again - I'm a monster), colored pencils, thread, or transfer paper (made from chalk or colored wax) and a tracing wheel. I also use marking tools during the fitting process, so that I can update the pattern with any necessary changes before iterating with the next prototype.
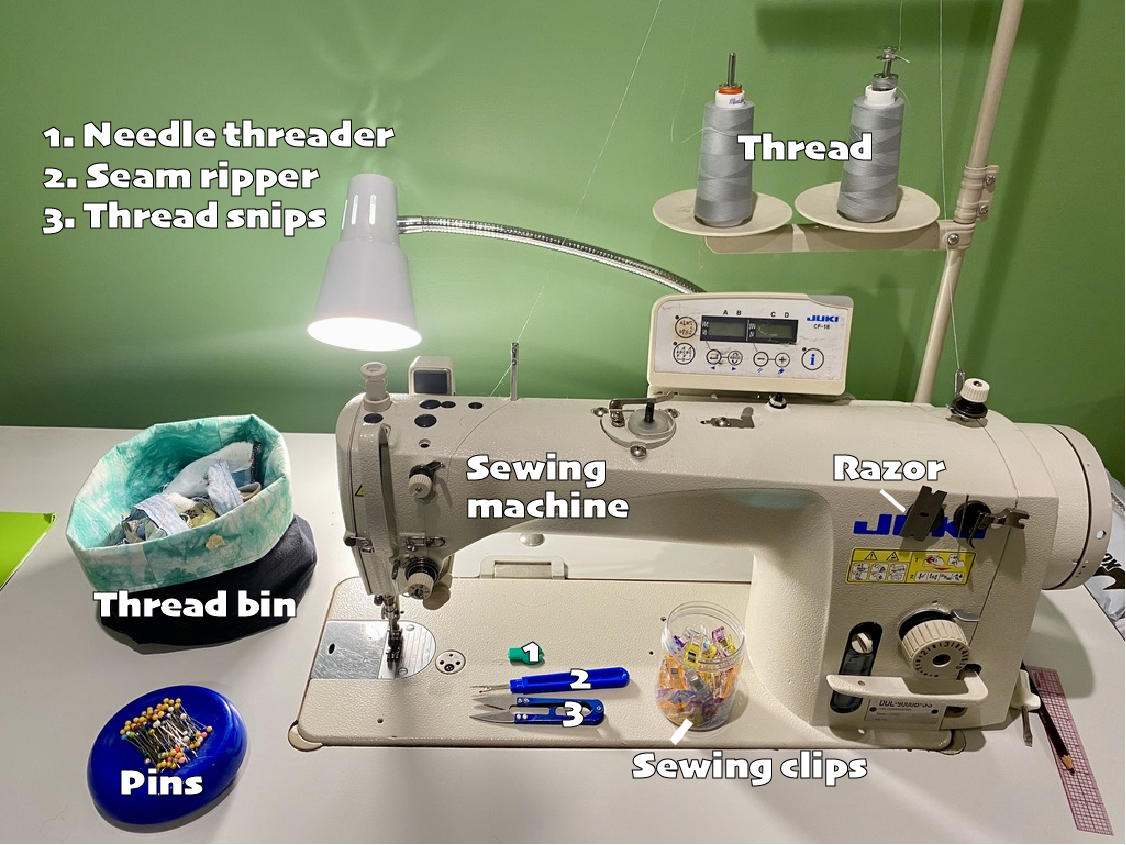
- Sewing machine: I'll do an entire separate post on sewing machines, but know that you’ll need one, and it should at a minimum be able to handle straight stitch, forward and backward, and maybe zig zag and buttonholes if you’re feeling fly.
- Sewing machine needles and thread: The former is how you get the latter into the fabric via the sewing machine 😊
- Rulers, sewing gauges, and measuring tape: I’m throwing these in again because they’re really important for the iterative piece of prototypes. Once you’ve cut the fabric, sewn it together, put it on, and marked it up, you’ll need to take measurements to you can adjust your pattern, rinse, and repeat.
- Seam ripper or razor blade: Look, we all make mistakes. Seam rippers are to clothing as erasers are to drawings. Last year I learned how to use a razor blade to more quickly break apart erroneous seams - it's a little scary, but it is quicker and more efficient (but please learn how to do it first, as bleeding can result without training).
Supplemental Tools for Prototyping
- Pins: While I don't use pins quite as much while sewing anymore (though I used to, and I really appreciated them as a beginner), I do find them helpful when fitting, especially when fitting the block (which doesn't have zippers or buttons or... anything, really. That said, please splurge and get high-quality glass-head pins. The cute plastic ones might melt under the iron, and cheap pins bend really easily, thus rendering them ineffective.
- Sewing clips: These are little spring-loaded clips that I actually like to use a lot more than pins, especially on really long seams. Plus they don't poke holes into fabric.
- Needle threader: Needles are hard to thread! A needle threader is useful, especially if you don't have one embedded into your sewing machine.
- Thread snips: Little scissors for snipping threads make for a neater, better looking garment when you're done. I've seen some folks using their shears for this, but the snips are quicker and easier to use.
- Thread bin: It's helpful to have a place to put all those aforementioned snipped threads - otherwise they end up on the floor and that becomes quickly unpleasant (especially if you don't really enjoy vacuuming/sweeping).
- Sewing apron: You'd never think an apron would be useful but OMG. It's a game changer! All those tools, all in one spot... My sewing space is usually a total mess and finding my random tools can be a chore, unless I remember to put it in my apron. (And yes, I did make the one in the photo, using my own pattern but inspired by some others!)
What did I miss? Share in the comments or on social media!