Fitting with Prototypes


This post is part of a series called 2020: The Year of the Pants. Catch all of the posts via the YOTP tag.
It's the moment we've all been waiting for! We've taken measurements, drafted the block, and now we're making prototypes!
You're going to have to forgive me a little for this post, because it defies any semblance of time or order. My goal with this post is to show you a couple of prototypes, demonstrating the importance of iteration and giving some clues on how to get from one iteration to another, specifically in terms of fit.
One of these is a neutral fit prototype, and the other is a hiking fit prototype (which is a bit more relaxed than the neutral fit, because hikers need room to move). If you want an overview of how to go from a neutral fit to a relaxed fit, I'm happy to describe that in a future post (but you're going to have to explicitly request it!) 😊
Hiking Pants Prototype #3
The first prototype I made was WAY too tight. It's not suitable for the internet.
The second prototype I made was nominally better, but it's in a gray area in terms of internet-acceptability. (I try to keep this blog safe for work, thank you very much.)
So here's the third prototype (as denoted by the V3 😉):
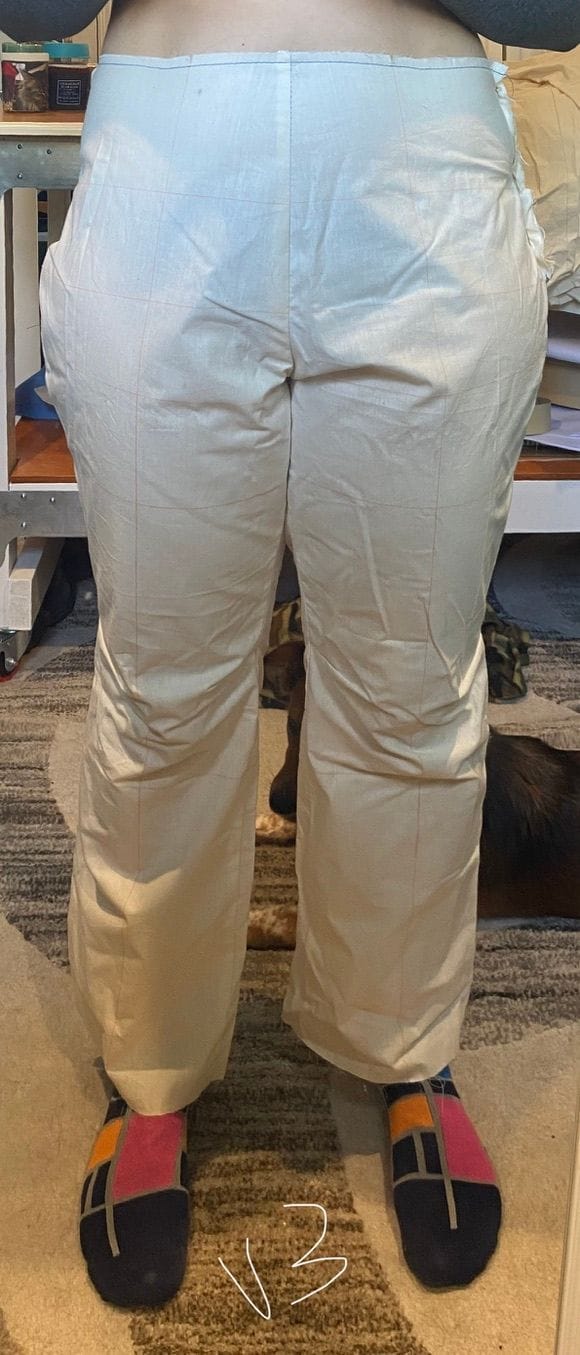
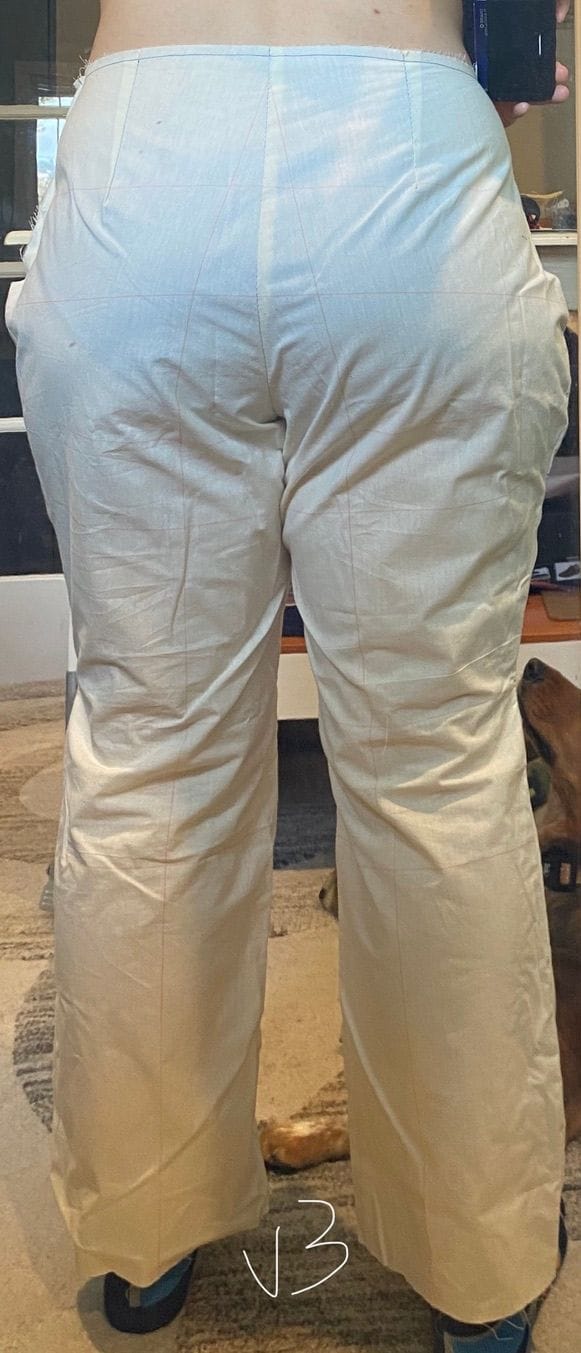
You're probably thinking to yourself: "Hey! Those look like pants!" And you would absolutely be right! They're totally pants-shaped! But they don't fit right.1
To assess poor fit visually, look at the wrinkles, starting from the top of the garment and working your way down. For my software friends, wrinkles are bugs that are causing tests to fail (remember: your perfect body is the test suite). The magnitude and direction of the wrinkles are the stack trace/tell the story about what's wrong.
You might also be able to see that I've added horizontal and vertical lines to the muslin. This is a great way to see how the fabric is hanging on the body: the lines are applied before the fabric is sewn, and should stay vertical and horizontal after it's on the body. If they're distorted, that's another great way to identify fit issues and their appropriate solutions. (Though you'll notice that the vertical lines on the back body are definitely not vertical above the hips; I need to figure out what's going on there and will get back to y'all.)
On the front:
- The waist is actually perfect. There's no bulging of skin or sagging of fabric, and the stitch line is right on the belly button, which is where I wanted it to be.
- There are tiny wrinkles coming in horizontally on the high hips. It hints at something, but it's small enough that it's worth holding off until we take a look at the back.
- There are wrinkles radiating horizontally from the crotch, one egregiously so on my left leg. This indicates that there is far too much fabric in the front crotch and that the fabric needs to be taken out.
- There are pooling wrinkles at the knees. This could mean either that the length is too long or that the grainline is a little off center.
On the back:
- The waist is still perfect. It's exactly where I want it to be, and there's no bulging of skin or sagging of fabric.
- There are more pronounced wrinkles at the high hips, pointing towards the booty. In conjunction with the minor wrinkles on the front, this indicates that the high hip is too tight and needs to be let out a bit, but it should be let out more in the back than the front, since the wrinkles are bigger in the back. (For those wondering what "let out" means, it means adding more room, which can be quickly tested by reducing the seam allowance in those areas.)
- The little horizontal wrinkles at the center back also indicate that the fit is a bit too tight in the hips overall.
- There are pronounced wrinkles in the high thighs, starting at the bottom of the booty and pointing towards the widest part of the thighs. This indicates that there's too much fabric between the low hip and high thigh.
Neutral Fit Prototype #X
(I don't actually know what number this is. Oops.)
This is a cool prototype, because it's basically A/B testing for apparel. While no human is perfectly symmetrical, it can be a good way to live-test a change without having to adjust the pattern, cutting out new pieces, and sewing it all up again (yet).
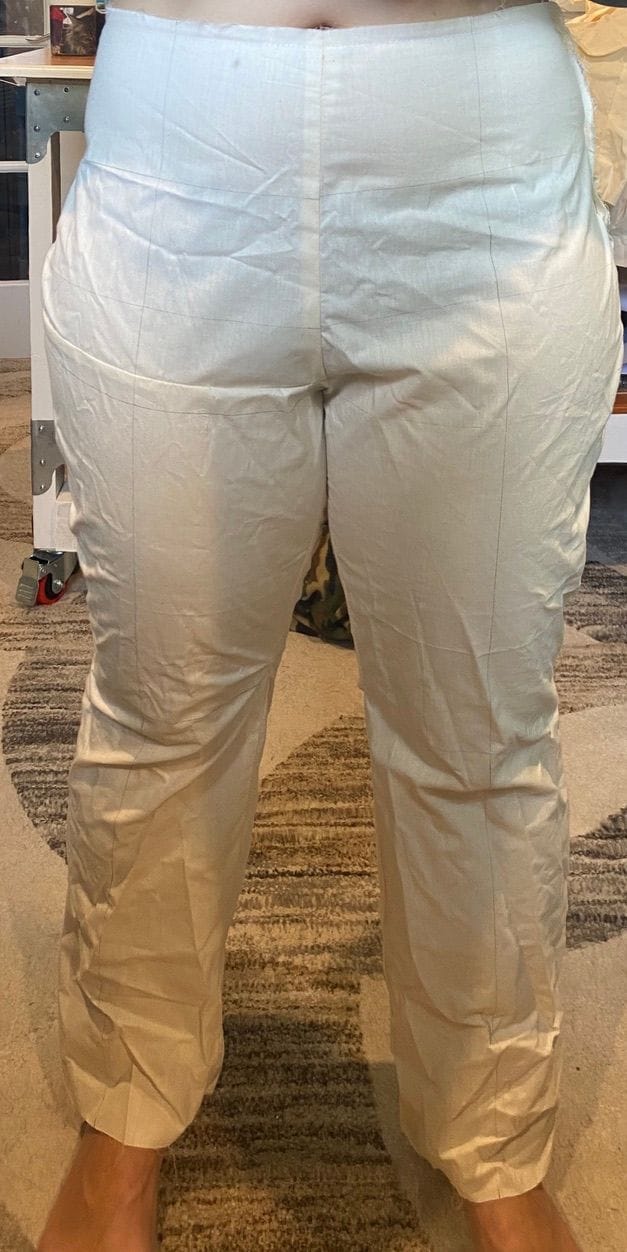
Notice how there's a subtle (but present) difference between the right leg and the left leg.
On the front:
- The waist is a little low, as indicated by the stitch line being just a tad lower than the belly button.
- There are still little wrinkles at the high hip. Again, this indicates that the garment is perhaps a little too tight in the hips.
- The left leg has a bit of a wrinkle at the crotch. On the right leg, however, I've pulled out some fabric on the high hip. The wrinkle is almost totally gone! It's a nice flat front and is closer to what we'd like to have in the final garment.
- The right knee has different wrinkles than the left knee. Up at the hip, I took out more fabric at the outseam than at the inseam, causing the length to shorten unevenly.
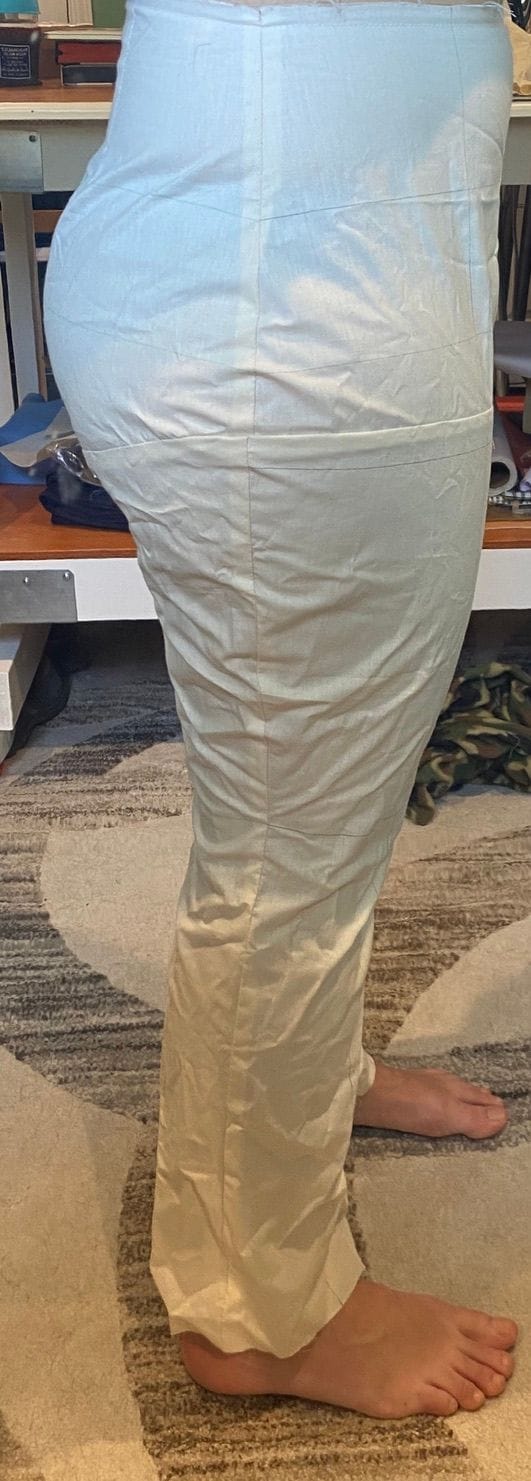
On the side:
- There's not too much to see here, except to point out that the seam on the side of the leg should be nice and straight. It's a little distorted, pulling towards the back body. This is almost certainly due to my calves, which are pretty muscular, and extra room needs to be added to the back.
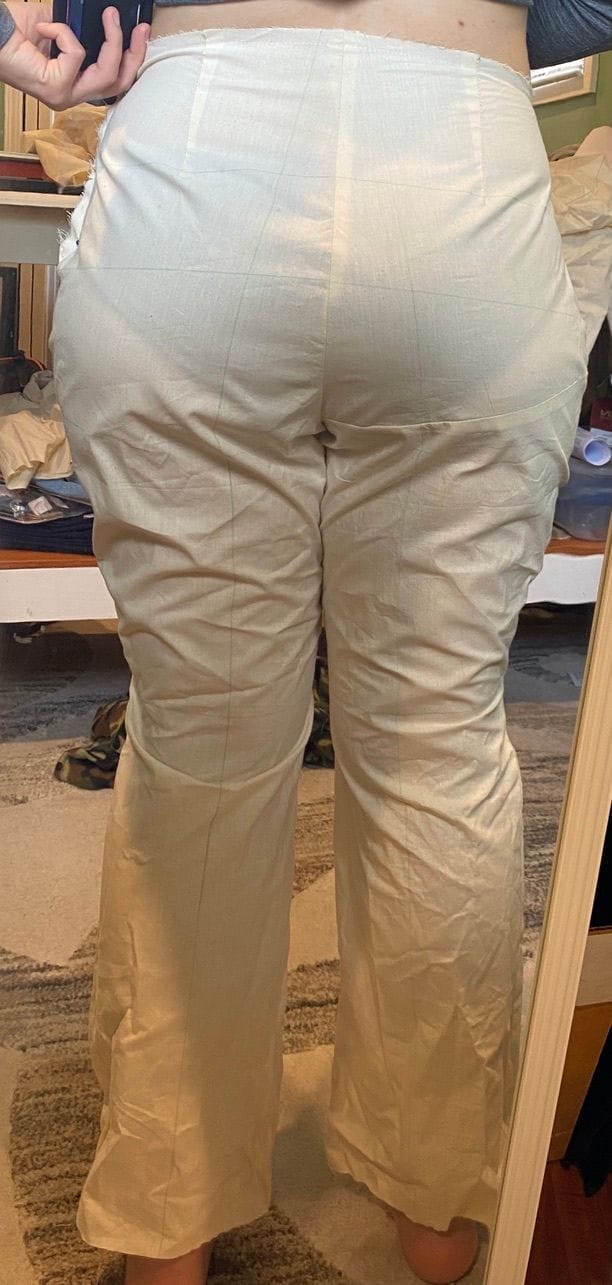
On the back:
- See the little horizontal wrinkles right at the waist? That's because it's too tight. But remember how the waist is a little low on the front? The waist measurement hasn't changed on the pattern, but being lower on the waist means that the measurement of that part of my body is larger than is accounted for on the body, so it's obviously too tight. Here's the fun thing though: The waist actually shouldn't be adjusted at all. This issue's solution is actually further down...
- Ah, yes, those high hip wrinkles. It's still too tight.
- The thigh wrinkles at the back crotch are much less pronounced than in the other set of images. But if you look at the center back at the crotch (okay, I'll say it: the bottom of the butt crack), you'll see little wrinkles radiating horizontally. Considering the waist issue plus this one, what's actually happening here is that the crotch is too high! So the fabric is getting pulled in, causing the waistline to get pulled down, resulting in a too-tight waist. (Neat, huh?) The thigh wrinkles on the right leg are certainly better than the ones on the left, thanks to the removal of fabric but sadly, it doesn't actually matter. The crotch being too high means that I should have adjusted the crotch first, before messing with any of the other wrinkles (because that one change would result in a cascade of other changes, which might change my approach moving forward).
Whew!
This post is already super long, so I hope I've made up for my Outdoor Retailer hiatus! 😉 (OR has been an absolute BLAST and I can't wait to sum it up in a future post!)
Fit is one of the hardest things to master, and as I hope I've demonstrated, I'm but a novice myself! And the worst part of it all is that any time the pattern or fabric changes, another round of fitting needs to occur. Fortunately for this blog, I've got quite a few different fabrics to play with, so I'll be sharing more on fit and fabric in the not-too-distant future!
Please do comment below or on social media - not only because I want to know I'm not writing into the void but also because I'd like feedback on how you like this series! Is it useful? Interesting? Boring beyond all compare? Let me know! 😄
1 As an aside: most folks don't know what "fit right" means, especially folks like myself, who are in the 12-20 size range. There's a reason for this that I'll get into in another post, but in short: brands don't make clothes that fit people like me. So we've stuffed ourselves into clothes, accepting something that fits well enough. When something truly fits, it's life-changing, and I only really discovered that feeling when I started making my own clothes.